Thursday, November 26, 2009
The flags are flying!
The flags are flying at our house for good reason! All four grandbabies were here at the same time! This gorgeous bright bunting from Amy at Giggleberry arrived right on the day! Fantastic! The flags will fly to celebrate many more occasions, I hope.
Labels:
bunting,
family,
flags,
giggleberry,
grandbabies
Friday, November 6, 2009
The innocent pleasure of a gift in the mail
One of the nicest things about the whole world of running an online shop is that you meet the other sellers. If not in real space, then at least through the pleasure of the letter box when a DUST craft swap is organized. Such a moment happened today when this gorgeous, happy, timely gift arrived from Emma.
Lately my hair has got to the point where I need to secure it back. And look what was in the parcel! Thank you Emma for the super bright and well made coasters, and for the surprise hair ties. They're great!
Labels:
coasters,
craft swap,
DUST,
Emma,
feliciafairy,
gift,
hair ties
Sunday, November 1, 2009
Tuesday, October 13, 2009
Toil and trouble for little black suckers
Purple came out well using multipurpose dye......
......but you can see why 'cold' isn't recommended for plastic buttons!
Black took forever. I didn't give in and eventually, more than an hour later, the little suckers turned black. Talk about 'Double, double, toil and trouble!'
Here are some additional pearls of wisdom...
It's still a matter of trying things out. Only use implements that are never going to have food in them. Let's not poison anybody. Avoid breathing in the fumes. The dye is toxic and dangerous; it's harsh chemical. I'm starting to lean towards Rit.
I'll have far too many red and green buttons for the ladies' Christmas craft workshop! Does any body want any?
Friday, September 18, 2009
How do you dye buttons?
'How do you dye buttons?' I've been asked, and I've been 'dyeing' to tell you! I've been practicing, having some 'wow' and 'oooh look at these' moments, turning the little critters into bright, colourful little beauties. It's quite amazing! Are you ready for a tutorial?
Use dye and hot water.
1. Dissolve some fabric dye in an old metal pot with boiling or very hot tap water. I've used as little as a teaspoon of dye to 250ml of water for a small lot. I've also used more dye and/or more water. There's no need to add salt.
2. Place the plastic buttons into the dye so they are covered. Leave them there for 10 minutes, stirring and shuffling now and again with an old spoon or kitchen implement. Keep the water simmering - hot but not boiling.
3. Remove the buttons and rinse them with warm water until the water runs clear.
4. Admire the results as you spread them out to dry! That's it!
Some hints:
I've used both Dylon and Rit brands, powder and liquid, and have been happy with all of them. Use the 'multipurpose' Dylon, as the one with 'cold' written on it only works on certain buttons. Chemists sell the little tins of Dylon. Try to negotiate a deal, because Dylon has a new line of sachets out now, and chemists are going out of the old stock. Rit comes in little boxes about the size of a jelly packet. Craft suppliers and Big W type shops also sell dye. You don't need a lot, so start small.
Use rubber gloves. Cover bench tops with a thick layer of newspaper. Chux is useful to put the buttons on to dry.
Expect the unexpected. The buttons will not all end up looking the same, as different materials absorb the dye differently. Some will be very dark, some light and some won't take at all. The same plastic materials will take the dye equally the same, but glass buttons don't dye!
You will think it's not working, but it will work. The buttons will look strange during the process. For a stronger result, increase the heat briefly, and/or give them a longer time. For less depth of colour try taking them out earlier or diluting the dye. Or try not using any extra heat at all. Try putting them back in again for more colour. Extra time and heat won't hurt, and it will give deeper colour.
Pearl buttons and beads take the dye well.
Op shops often supply used, white shirt buttons. Reuse, recycle, repurpose and upcycle them!
Use a curtaining net type fabric as a makeshift sack when you have lots of small buttons, to save 'fishing them out.' Use the same net sack for rinsing, or use a colander.
Keep dyeing lot after lot in the same hot dye solution.
Try mixing colours. Make some pink, then add a little blue to get mauve, etc. Maybe turn some blue buttons mauve by putting them into pink dye. Or change emerald green into mint green by adding a little blue. Remember the colour wheel and be creative! White and light coloured plastic buttons work best.
You can use a microwave instead of the stove top.
The dye can be tipped down the sink. You could keep it, but I haven't bothered as it's quite cost effective in small amounts.
Let me know how you get on! You know I'm dyeing to hear from you!
Sunday, September 13, 2009
Monday, August 24, 2009
Dyeing buttons
Wednesday, August 12, 2009
Friday, August 7, 2009
It's a smockshop!
Yet another new shop has just been established. It invites custom orders for children's art smocks.
Friday, July 31, 2009
My first ever treasury - the things people do with buttons
I've made a treasury! It's almost as exciting as my first sale! But this time lots of etsy friends shared the joy!
Wednesday, July 29, 2009
Will you Pay It Forward?
Jess (epherielldesigns) sent me a great little handmade gift, and I'm going to pay it forward to some of my special friends. If you'd like to join in, leave me a comment! This is how it works:
I’m sure many of you have participated in craft swaps over the years, but I want to take the concept of sharing what we love that one step further.
And so – Handmade Pay It Forward. The idea is simple. You recieve a handmade gift from a fellow craftsperson. You Pay It Forward by sending some of the things you have made and loved to others.
***
In order to participate in this, there are a few requirements:
1. I will choose an undisclosed number of people who comment on this post to send a gift to. This gift I have made with my own hands, and with love.
2. If you choose to comment, and/or you receive a gift from me, you commit yourself to Paying It Forward.
3. You must then make a post on your blog, making the same offer to your readers.
4. On your blog post, you must include this list of requirements (basically, all the text between the asterisks). You choose how many people you Pay It Forward to – though it would be nice if it was more than one. However, I realize that some of you make high-end or expensive wares, and I don’t want to exclude you from participating by setting a minimum number above one.
5. In each of your packages, as well as your gift, please include a minimum of 5 business cards (if you have them). Also include the business cards that you received in your gift – this allows every recipient to visit the people who’s generosity brought Handmade Pay It Forward to them.
6. Finally, in your PIF blog post, include the history of your gift – i.e. the name and blog of all the people before you in the journey.
Handmade Pay It Forward 2009 – Those that gave before me: Jess from EpheriellDesigns, Liz from hundredsofbuttons,
7. Please only participate once. Obviously, if you haven’t received a gift within a few weeks of leaving a comment on a PIF post, you can probably assume you missed out that time, and try again if you see it elsewhere :) This keeps the PIF goodness spreading to new people! I think I will start a new one once a year… but we’ll see how this evolves!
Please use this button on your blog to share that you have participated!
***
That’s it :) I really hope this takes off and allows us to share the joy of our creations with each other!!
Jess, Liz, xo
Labels:
Handmade Pay It Forward 2009,
pay it forward,
PIF
I made the front page!
Friday, July 24, 2009
The etsy DUST Christmas in July sale is on!
Saturday, July 18, 2009
safety pins and buttons mkII
Thursday, July 16, 2009
Art smocks from my sister's shop
Finally my sister Jan has an online shop! She makes great art smocks and sells them for a low INTRODUCTORY SALE price.
Sunday, July 12, 2009
Memories of BrisStyle indie market
What a great market! It was at Hamilton, Brisbane. Those BrisStyle etsy girls did a fantastic job!
I bought some lovely items, including some gorgeous little red baby shoes, a dinosaur babyboy singlet, and some earrings from Jess.
I'm determined to order myself some moo cards.
I thought I'd be mugged! I bought the last copy of Peppermint magazine issue 2 from Kelly at the market. Now I'll have a full set, because I've subscribed.
Labels:
BrisStyle,
market,
moo cards,
Peppermint magazine
Monday, July 6, 2009
The things etsians can do with buttons!
I enjoy seeing buttons upcycled into beautiful handmade items like these, by PoorRobin, DELiciousDesignz and Moonmum
Wednesday, July 1, 2009
I gifted it!
Wednesday, June 24, 2009
Thursday, June 18, 2009
Wednesday, June 17, 2009
Monday, June 15, 2009
I'm so lucky!
rainbowrevolution - Leanne- sent me this beautiful wrap with an added bonus gift for grandbaby boy Ryan.It's a prize for a DUST thread. I'm so lucky! And my perfect tote from alipink - Alison - arrived today, with bonus gift of yummy white buttons, too. It's in use already. I'm so lucky!
Wednesday, June 10, 2009
Saturday, June 6, 2009
Win this kit this weekend!
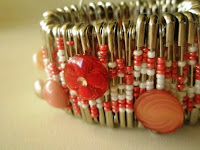
Enter the aussie handmade giveaway this weekend to win a DIY bracelet kit and a grab bag of items similar to those in my etsy shop.
Labels:
bracelet,
button bracelet kit,
giveaway,
kit
Friday, June 5, 2009
Wednesday, June 3, 2009
Wishlist Wednesday
Tuesday, June 2, 2009
The week goes on...
Yesterday was quite an etsy kind of day, and last night it went on... I entered a chat room, had some fun, and ended up in a treasury! Apologies to Penny pocketcarnival for failing to acknowledge her coin purse in the etsy DUST picture a few days ago. Today I posted a custom order of these 2 very pretty bouquets to Manhatten. This afternoon I decided there is so much interest in (giveaway feedback) my flowers that I've made special discounted listing in my etsy shop. And so the week goes on...
Monday, June 1, 2009
What a nice morning!
I've had a lovely morning! First; slept in. Second; it was raining. Then; I won the DUST stuff n nonsense thread monthly prize. Next; a surprise gift arrived in the mail from Stacey of etsy sunweeds. And; it's my turn in the DUST aussie handmade giveaway. Then; after lunch the Australia Post van brought (turn away now, Anne & Scott!) Ryan's gift from wiccked.
Now it's taking me all day to decide which prize to choose... watch this space!
(Oh yes, there's another sneak preview of my aussie handmade giveaway pictured above.)
Subscribe to:
Posts (Atom)